Twitch streaming has become a popular way for gamers to connect with each other. Over the years, the platform has evolved and is now thriving as a competitive market with thousands of players competing with each other in games like CS:GO, Dota 2, League of Legends and more.
I’ve been streaming on Twitch for over a year now, from gaming to anime and everything in between. It’s been an amazing journey into the streaming world, and it has been my great pleasure to learn so much about different communities with live feedback. What was once just a hobby for me has turned into an active passion, and I couldn’t imagine doing anything else.
In this post, we’re going to cover the best Twitch banner and channel art sizes. Plus how to create the best channel art for free with a design tool like Canva.
This is absolutely crucial if you want to have a professional-looking channel!
Table of Contents
About
One of the major leading channels in the live streaming industry on the internet is Twitch. The platform has recorded over 100 million different users who stream on its network and more than 25,000 channels or networks that partner with it (Source).
When it comes to streaming internet sports especially, one of the places to go is Twitch. In comparison to the past, the ease of access to live streaming has grown significantly, thanks to the Twitch network and even gamers from various age groups who create their own channels to show their gameplay to interested persons all over the world.
If you already have a Twitch channel or are looking to create one that you want people from the world over to subscribe to, you should make sure that your channel is one that sticks out among the various already existing channels.
Among the many things that could help you achieve this is having the right size of banner and profile picture, but the most important is ensuring that these visuals that have a professional outlook.
In this article, our focus will be on the right banner size, the right size of file that is best for a banner, how to upload a Twitch profile picture, how to make a Twitch banner, and so much more.
List Of Twitch Channel Art & Appropriate Size Dimensions
| Channel arts | Dimensions (Size) | Maximum File Size |
|---|---|---|
| Twitch Profile Picture | 1600 x 1600 pixels | 10MB |
| Twitch Profile Banner | 1920 x 480 pixels | 10MB |
| Twitch Panels | 320 x 160 pixels | 2.9MB |
| Twitch Emotes | 112, 56, 28 (1:1) pixels | 25KB |
| Twitch Sub Badges | 72, 36, 18 (1:1) | 25KB |
| Twitch Offline Banner | 1920 x 180 pixels | 10MB |
| Twitch Overlay | 1920 x 180 pixels | 40MB |
| Twitch Alert | 750 x 300 pixels | 3MB |
| Twitch Thumbnail | 1280 x 720 pixels | 10MB |
A Real Example
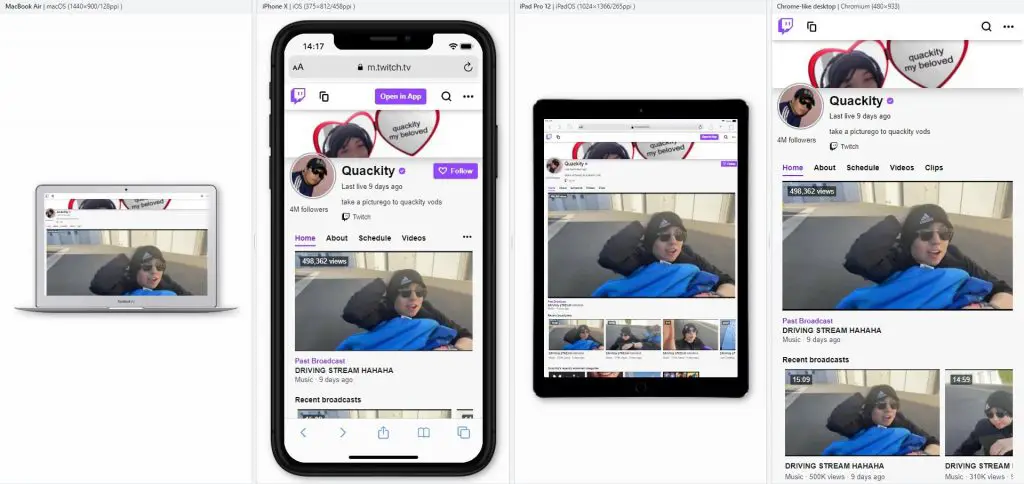
The Quackity Twitch channel is highly popular- you can see how the channel art renders across an iPhone, iPad, laptop, and Desktop.
How to Make a Twitch Banner + Free Custom Templates
The YouTuber has some great design tips for creating custom graphics that really pop!
The Ideal Twitch Banner Size
The right dimensions of a Twitch banner that is recommended is 1920 pixels x 480 pixels (that is, an aspect ratio of 4:1) for HD and full monitors like TVs. Twitch, on its own end, recommends that the dimensions should be a width of 900 px and a height of 480 px.
However, when a banner of this size is displayed on a large monitor such as a TV, the image quality is reduced significantly. This is the major reason why a wider banner is recommended.
There are many sites that provide templates which you could use for your own channel such as Canva and Snappa.
How To Make A Twitch Banner For Free
Below is an outlined step-by-step process to creating a Twitch banner on Pixelied for free. And you don’t even need to be a designer to create graphics your community loves! (You can also use Canva for free).
Step 1: Register
To be able to use Pixelied, you must first register. Don’t worry; registration is free and doesn’t take much time.
Step 2: Selecting a template
After your registration, you will be taken to the Pixelied homepage. There you will find various formats or templates. You can simply type in ‘Twitch banner’ in the search bar to help you quickly access appropriate streamer templates that will work on mobile and even larger monitors.
This takes you to the template library. From there, click ‘Twitch,’ then click ‘Twitch Profile Banner’ in the panel to the left.
Browse through the templates and then select the one you like.
Step 3: Customize the template
After selecting a personal branding template, Pixelied will take you to its editing page, wherein there are tools to help you customize the template so that your content really pops.
What Is The Twitch Profile Picture Size (Avatar)
The ideal size of a profile picture that your Twitch channel should have is 1600 x 1600 pixels (an aspect ratio of 1:1). This size will not only look good on any display, it also makes sure that your profile picture is of the best quality.
How To Make A Twitch Profile Picture For Free
Below is a guide to creating a Twitch profile picture for free.
Step 1: Begin with a Blank Canvas
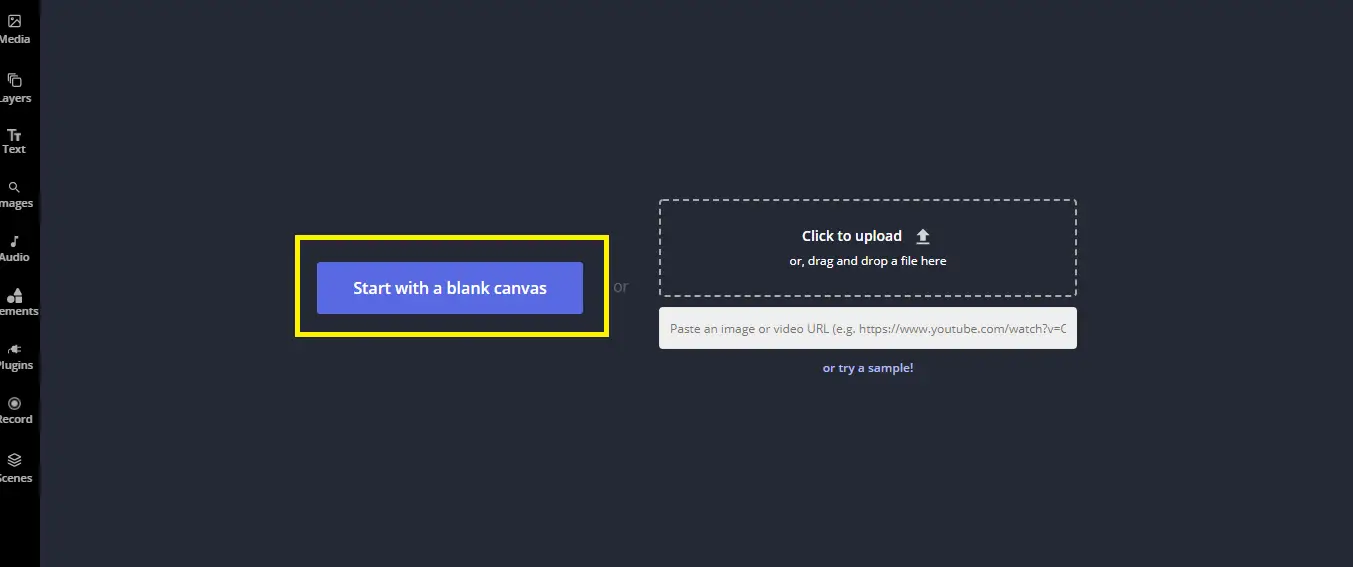
Go to Kapwing. Click the first link to open the studio. Then click the button labeled, ‘Start with a blank canvas.’ Don’t change the default aspect ratio (1:1).
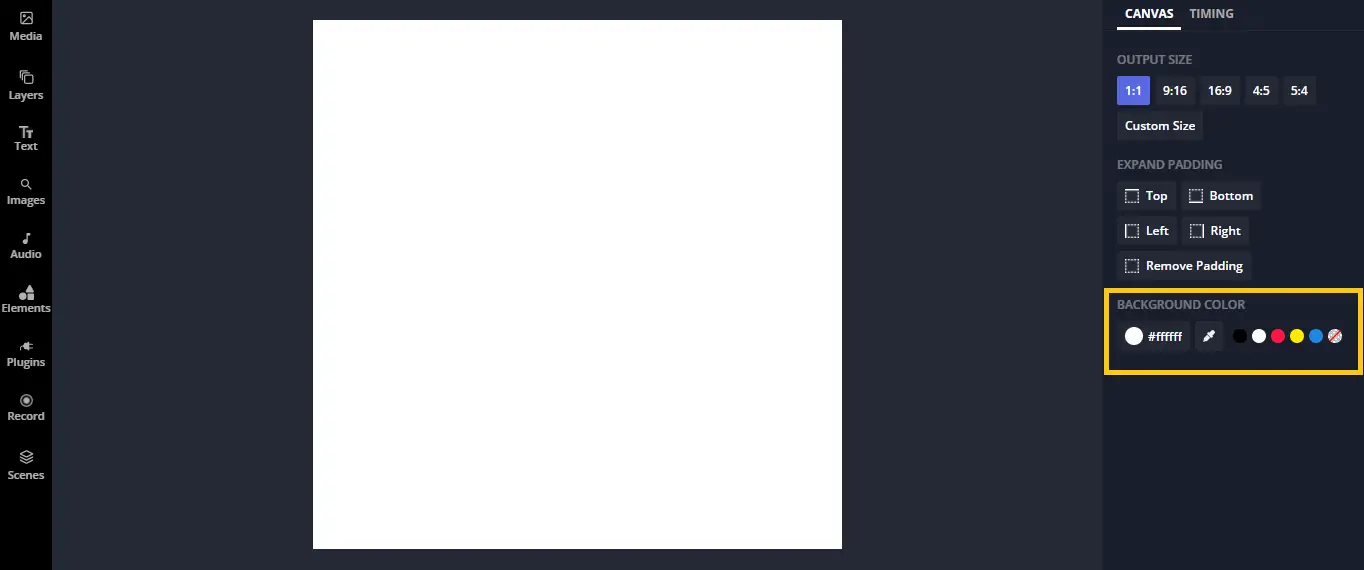
You can use the color picker to the right of the canvas to change the color of the background. You can simply type in the HEX code of the color you want if you know it.
Step 2: Make your design
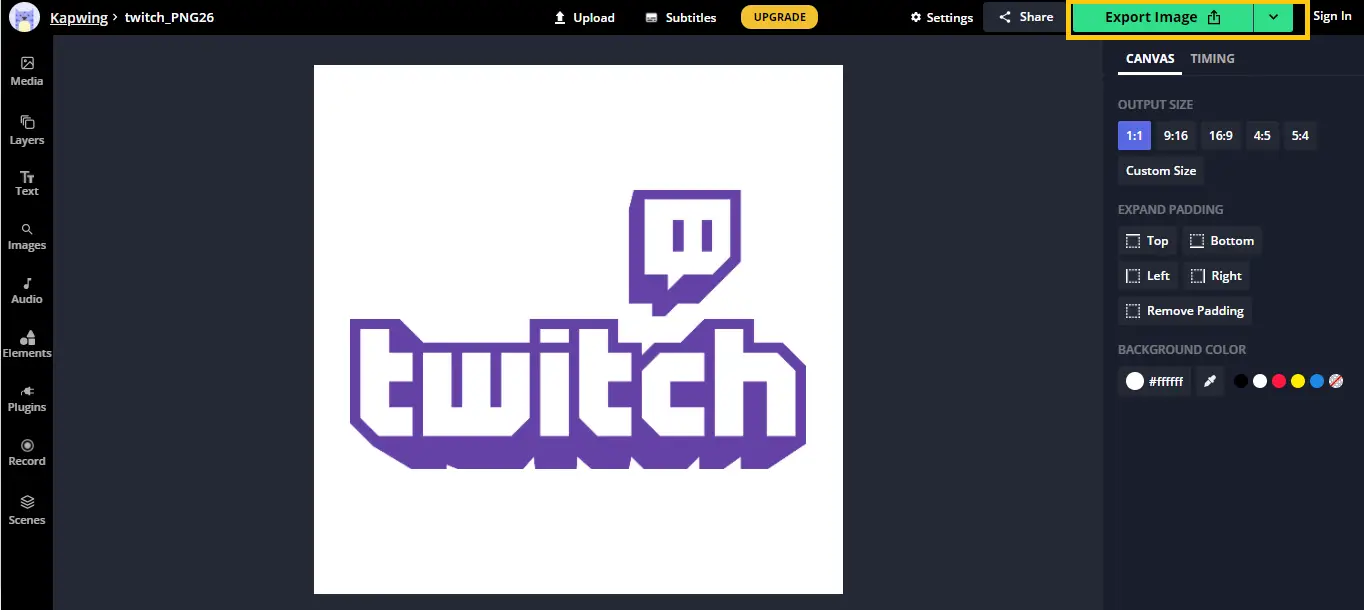
You create a new design or upload an existing one. For the sake of this tutorial, the design below is a model of the logo of twitch. But you can choose your own color schemes to make your social media platform really resonate with your personal brand.
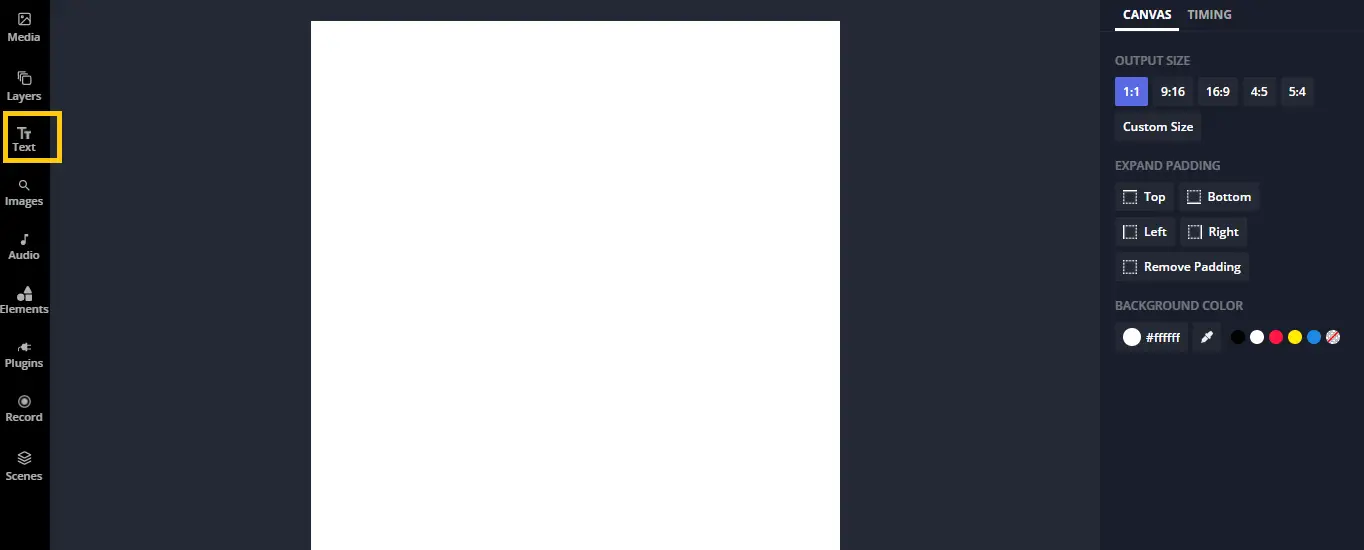
Suppose you want something like the above; select ‘Text’ from the toolbar. After you have selected one, you can then edit it. While designing, remember that you have to be original and that your design should depict what your channel is about.
Step 3: Try using a design that already exists
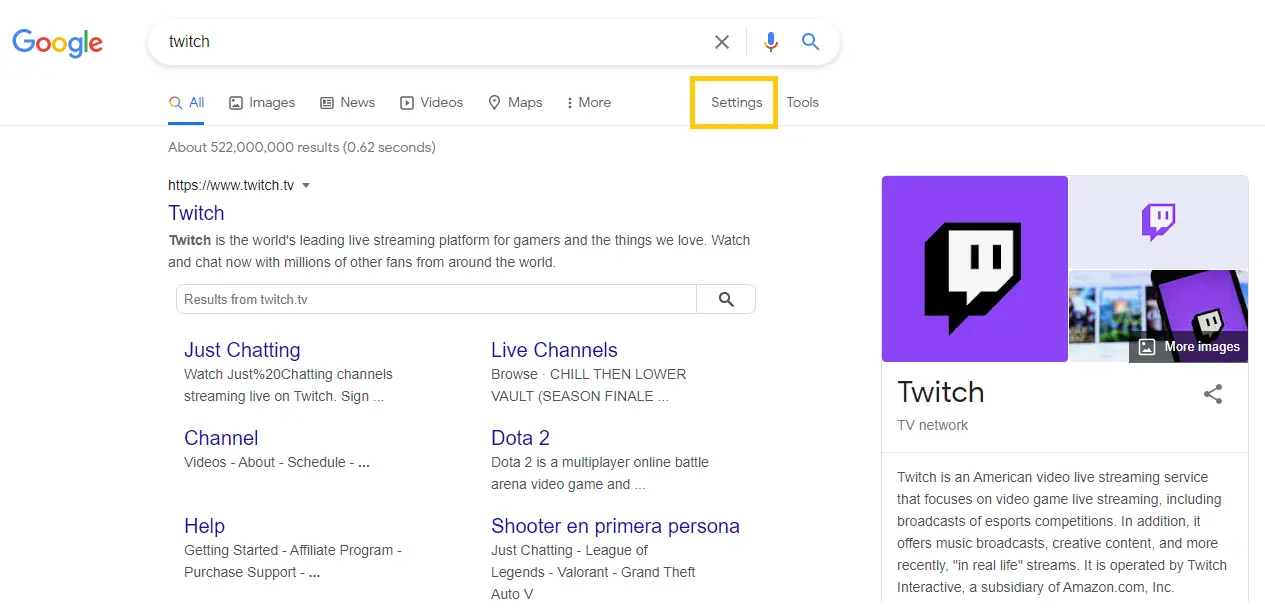
If you can’t design a unique logo, then you should use one that already exists. Open your Google Search and under the search bar, click ‘Settings.’ Next, click ‘Advanced search,’ then scroll down to the ‘usage rights’ section. Click the drop-down menu and select ‘free to use, share or modify, even commercially.’ This prevents copyright infringements.
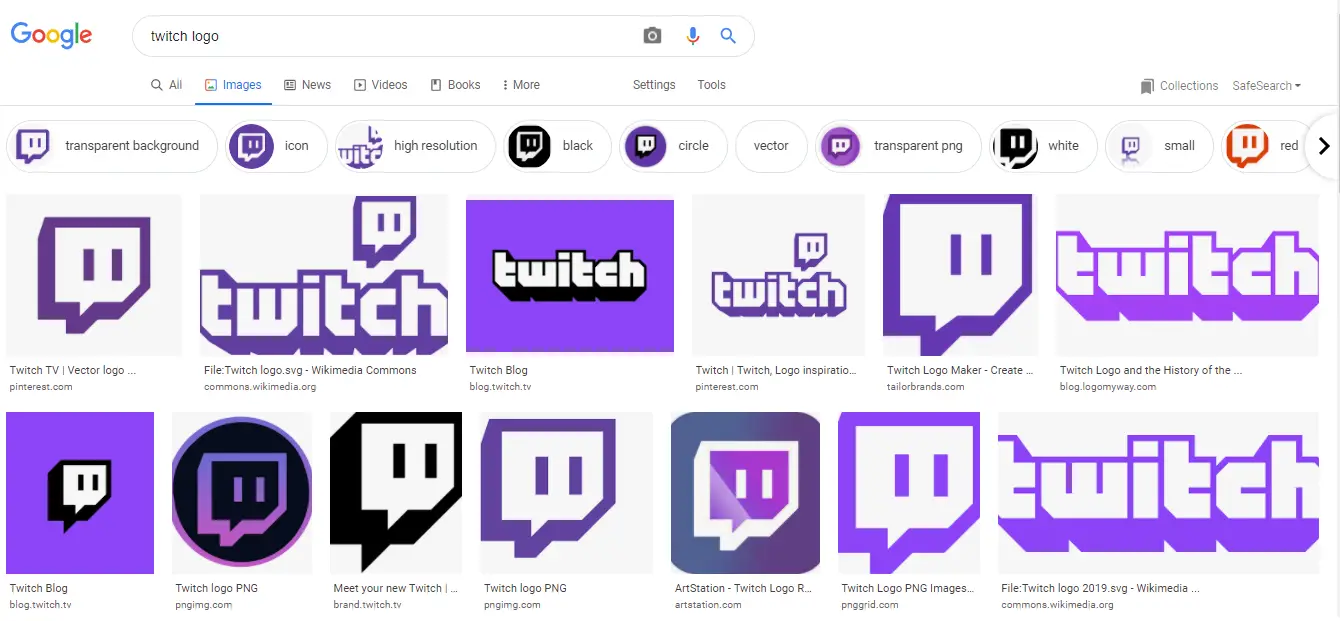
Next up, is to search for any image that works for your channel on Google. When you find one, copy and paste on Kapwing.
Step 4: Publish then Download
If the design is okay with you, click ‘Export Image’ at the top right-hand corner of your display and wait for the processing of the design.
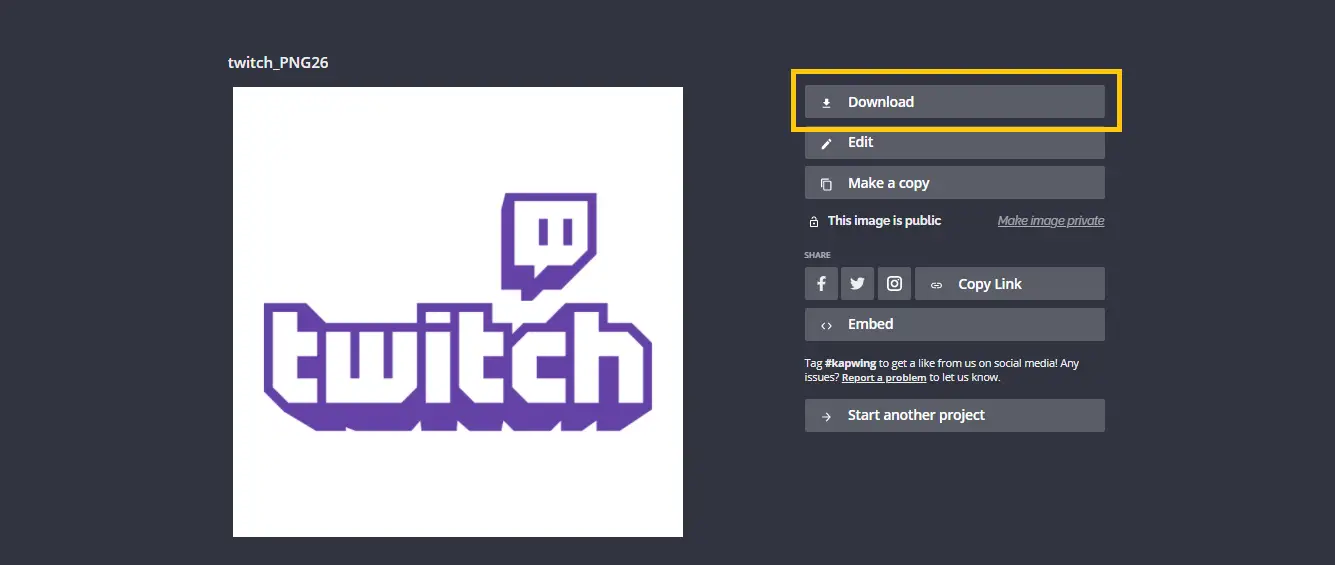
When the processing finishes, download the image to your device.
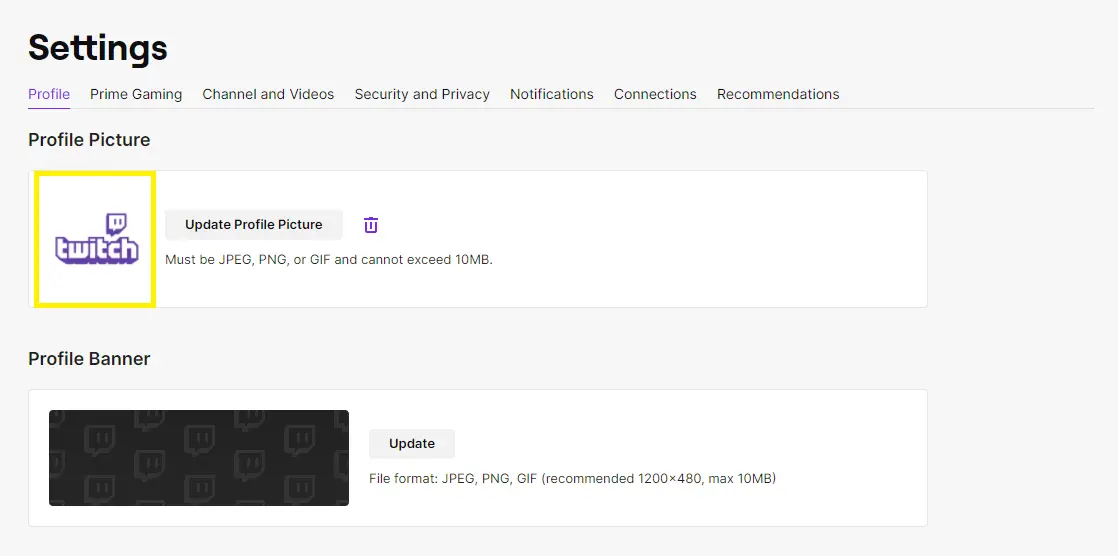
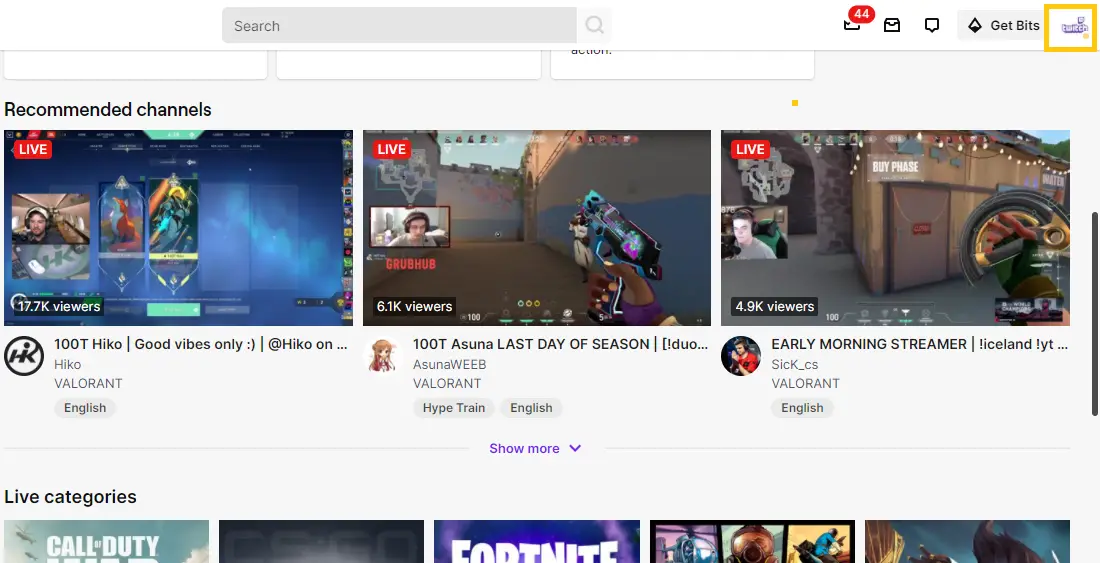
Step 5: Open Twitch, click on your profile at the top right corner of the screen and select ‘Settings.’ After that, select ‘Update profile picture’ and then upload your new design.
The final project will look like this:
How To Upload & Update Your Twitch Banner
There are two ways to upload or update your Twitch banner. You can update your Twitch art on the channel or from the creator’s dashboard.
Updating The Twitch Banner On Channel
Below is a step-by-step process to upload your Twitch art on channel
Step 1:
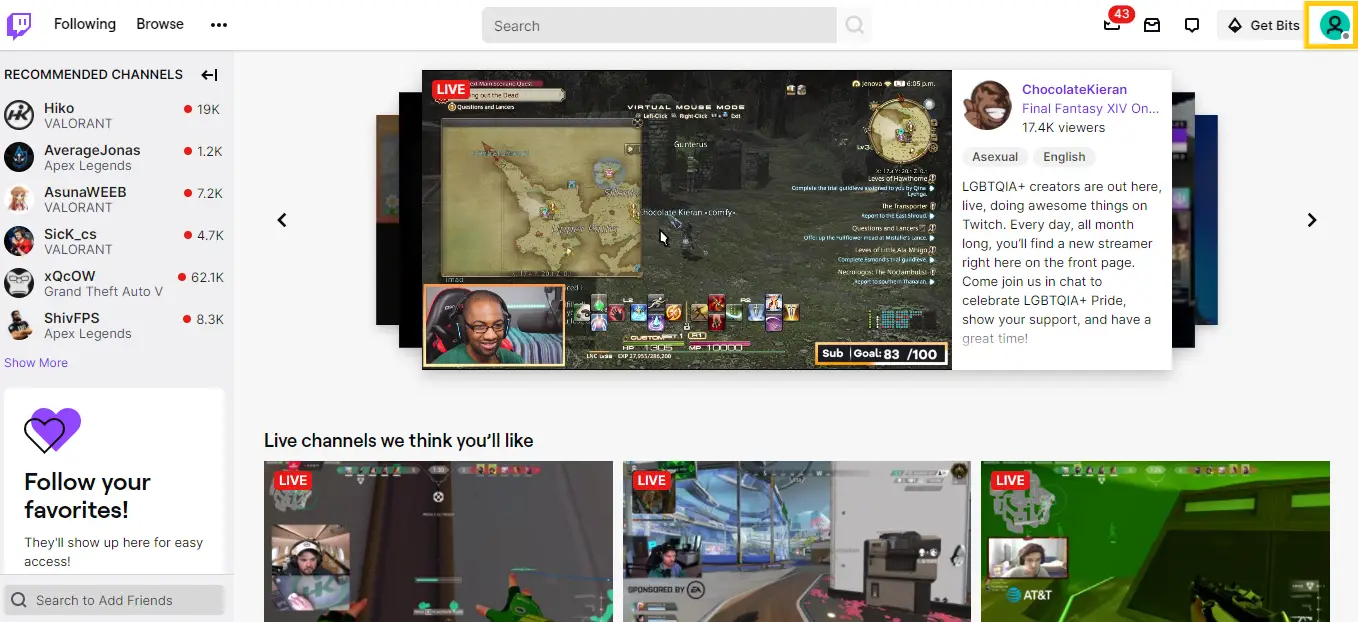
Click on your avatar at the top right corner of your screen.
Next, on the drop-down that appears, select “Channel.”
Step 2:
Then, click on your avatar close to your name at the top left corner of your screen. This shows your banner:
Step 3:
Hover a little over the banner, then click on “Update Profile Picture.”
Step 4:
Select the file you want as your artfrom the local files on your computer. Once selected, the file will be automatically resized to fit the space (if the dimensions are not a fit)
Upload Twitch Banner from Creator Dashboard
Go to the top right-hand corner of your screen. Click your avatar and then click ‘Creator Dashboard’ in the drop-down.
Click your avatar again. This time, click ‘Settings.’
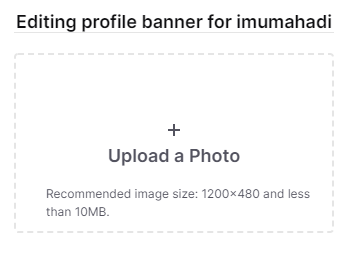
Locate the profile banner section and click on ‘Update.’ A box labeled ’Upload a photo’ will appear.
Select the file you want as your banner from your computer. The banner will be upload and automatically resized to match the space.
File Size & Format Considerations
For each channel art on Twitch, there are recommendations regarding the size of the files you should upload and the format (dimensions) that will make your channel art look good on both large and small screens. When your design looks good, you attract more viewers to your channel.
Twitch Banner Design Best Practices
- Colors, photos, and icons should be included: If you belong to an organization or a team, Twitch is one platform that allows you to include the logo of your organization or team as well as its colors. The logo, colors you use, and icons that you include in your banner is necessary for attracting more viewers to your channel. As for persons who have already engaged with you previously, they can know that they have gotten on your page by the time they find your logo on the banner.
- Refrain from using too much text: People usually assume that they have to provide a lot of information. One can’t really blame them. After all, they do so probably thinking that with more information, they can help viewers make a more informed decision. More information about your organization should be on your website and not on this backdrop artwork. Besides, when you include too much design or text on it, you make the banner unappealing. A professional design should look simple – when there is too much text on a banner, everything looks cluttered. Text is only meant to provide key information.
- Maintain consistency: Consistency in visuals is very important. Regardless of the fact that you are creating a profile picture or banner, the colors that you use should never change. Besides colors, other things need to match up as well, like fonts and style of design. All the leading Twitch channels have a consistent graphics design. Take a look at social media networks. Facebook’s logo, for example, has always carried its unique blend of white and blue colors, and the company is over 10 years old. It’s not that they don’t think about other good designs or that they don’t have ideas to tweak things up. It’s just that they understand the value and importance of consistency.
How To Brand Your Banner
Picking or designing a banner is great, but you also need to put in somewhat of a signature brand or something that helps your viewers know that it is your channel. Your brand could either be a logo, an icon, a social media handle, or all of the above.
To add a brand
- Upload the design you have saved on your computer to either Photoshop, Canva, Snappa, or Kapwing.
- Place your logo, social media handle, or icon on the banner, preferably on a corner such that the logo does not cover any important information or element in your banner
- Save the file to your computer
- Finally, upload the design with the logo and/or social media handle to your Twitch channel.
Conclusion
The design of your Twitch channel must be the right size if it is to look good and professional. You don’t want a banner that is either too big or too small – you must alter the size to fit all kinds of screens.
However, just adding any old artwork to your channel is not enough. Branding is the best marketing strategy, so a design without thoughtful branding just won’t cut it.


![How much does it cost to print 1,000 flyers? [Stats]](https://banneradviser.com/wp-content/uploads/2022/03/maxresdefault-218x150.jpg)
![What are Yard Signs Made Of? [Science] What are Yard Signs Made Of A Look at the Different Types of Materials Used in Making Yard Signs](https://banneradviser.com/wp-content/uploads/2022/04/pumpkin-2759904_1280-218x150.jpg)






![Etsy Image Sizes: Picture, Banner & Listing Dimensions [2022] How to Create an Etsy Banner Size, Dimensions, and Tips](https://banneradviser.com/wp-content/uploads/2022/04/AdobeStock_245675588-min-218x150.jpeg)
